Monday, March 12, 2012

Track Day @ Lakeside/QR

Sunday the 12th of March marked my first proper session on a track.  Sure I had some time previously at the Powercruise, but this was some actual time where we were given the opportunity to actually drive, instead of being limited to 100 kph... $40 got us track time at 2 tracks (Lakeside & Queensland Raceway) including meals... little did I know just how much value for money I was getting!!!


Anyways the day started off bright and early with a pre-meet for the Gold Coast people at 5am.  Been a damn long time since I've been up this early!


Nothing like driving at the crack of dawn as the sky starts to get light... Empty freeways, a cold air full of anticipation and excitement... as hard as it is to get up its always worth it :)


Everyone had to give their cars a good blap through the Clem 7 tunnel... Pity about the speed cameras, feeling for ya Pubes!  Regardless, the sounds that we can make in that tunnel always put a smile on our face :)


It was dry when we left the tunnel, and wet when we left.  Never a good sign, and it had us concerned for a bit, but thankfully the rain stayed away for the whole day.  We had a couple of light showers come through, but nothing that affected us while we were on the track.


Waiting to get into Lakeside... I've never been to this track before, only ever heard of its existence.  So didn't really know what to expect, especially given that I was still waking up and my mind was having issues functioning...


This was our crew of cars... for some reason the song about coconuts all standing in a row comes to mind =D  Also a great shot of the impending clouds that had most of us (there were a few that were looking forward to the slippery conditions) worried. 


Lakeside is a very fun track.  Some very tricky corners, a lot of variance in conditions, and plenty of hills to keep things interesting.

We started off with breakfast, while another group had some track time.  We had what was basically a practise session, where you can take your car out and just drive.  It differs to a proper track day because its a lot less formal, there's no official rules or regulations, just a session where people can get out in whatever car they choose (everything from tuned Civics and WRXs to Rav4's and Holden Cruze's).  No helmets, no long sleeved attire, just common sense and good times :)


Unfortunately this guy got a bit excited and had a moment... 

Needless to say mate, I feel your pain!! He simply got too aggressive, cut a corner, got some wheels on the grass and lost control.  Spun a couple of times, smacking the front and the rear at the same time.  Thankfully he and his passenger are OK, but unfortunately the car isn't.

We were concerned it might have had some ramifications for our session, given that we were on after the accident happened, but all it resulted in was a comment about being careful, knowing our limits, and driving to suit the conditions.  Duly noted :)  Didn't want a repeat of history!


Waiting to get on the track, I couldn't work out if I was more excited or nervous!!  I did have to laugh, there were 2 guys from the previous session that I overheard making a comment about how they can't wait for us to clutch kick... for the uneducated, basically they couldn't wait for us to start drifting.  I wish I could've seen their faces as they ate their words... granted, the appearance of some of our cars could've definitely led to their conclusion, but to be honest, I think quite a few of us would've had them quite easily :)


Sorry, bit hard to take photos whilst driving =P and driving hard at that!!  We were given free reign to drive, and drive we did.  Had an absolute blast just pelting around, going pretty damn hard out and then some :)  Had to back it off a bit as I had some braking concerns I was mindful of (cracked brake rotors will have that effect on you) but the highlight of the whole day was having a great battle with Casey.  We ended up meeting on the track, and I'm proud to say, a race broke out.  It was genuinely wicked fun, going as hard as we dared, trying to match each other corner for corner, doing what I always wanted to do as a kid.  You could seriously not wipe the smile off of either of our faces, and it was something we talked about for the remainder of the day.

So instead of taking photos as I was too busy driving, I got a photo of all of us after our track session, talking about what can only be described as racers excuses =P trying to justify moments of poor driving or judgement, and rubbing in the moments that were amazing.  Oh and letting the cars cool down properly of course... Track time is bloody hard on any car!


Did find this classic baby down the bottom of the function room... beautiful.  

There were several other groups too that ran after we did, and I got some (average) photos of some of the other cars we got to watch.


A beautifully finished Caterham 7 (looked a lot better in person, trust me)


A formula ford kind of thing


This thing was brutal.  So quick, so much downforce that it handled like a slot car, and so damn low that across this back straight, all you could hear was its body scraping on the ground, followed by a heap of smoke that was generated from the scraping body


And another variant of some incredibly custom vehicle.  Gotta love purpose built machines!

We headed off about mid morning to continue our day at Queensland Raceway (QR).  We arrived to the sound of screeching tyres, and that could only mean one thing...


Short track was on :)  So incredibly relaxed, just guys drifting as they wanted to without having to worry about scores or doing perfect runs, it gives them opportunities to experiment.  The guy in the black car was having big issues retaining his body panels, he lost quite a few panels to the cones while we were there, and the guy in the maroon car was having quite a fun time wrecking tyres, to the extent that we saw smoking chunks of rubber flying off his wheels.


Anyways we headed back to watch the bikes that were running around QR.  They had the national track open, which is the same track that is used by the V8 super cars.  They also have shorter variants for different occasions.  Needless to say, guys on bikes are nuts!!!  So much speed, such heavy cornering, and so much at stake if you have an off.  We watched the bikes for quite a while, and while we were doing that, an F18 hornet from the nearby air force base flew over.  So awesome!!!  There was also a muscle car group at QR who had some beautiful examples of cars, including this...


A car that resembled a Lamborghini Countach, but went by a completely different name.  Something quite ridiculous that wasn't familiar at all, but it still had an absolutely amazing presence about it.


Gotta love mid mounted engines!


And so incredibly in awe of the stance of this thing at the rear.  So insane, so striking, with those insane exhaust tips, and those 345mm wide rear tyres.  345mm!!!!!!!!!!!  We all felt a bit inadequate after seeing this thing...


I'm throwing this in for my girlfriend, who is an avid Mustang fan :)  There were so many fantastic examples of muscle cars, but I'm sure we all know what tidy examples of mustangs, camaros, GTHO's and what not look like.  I love you babe <3


There was however, an absolutely bad ass Mini that deserved a photo.  This thing was an absolute rocket, and its no wonder this car was such a revolution when it entered the racing scene back in the '60s.


Couldn't pass up the opportunity to snap this beauty on the track though :)


And how can you not love that sound... *froth*
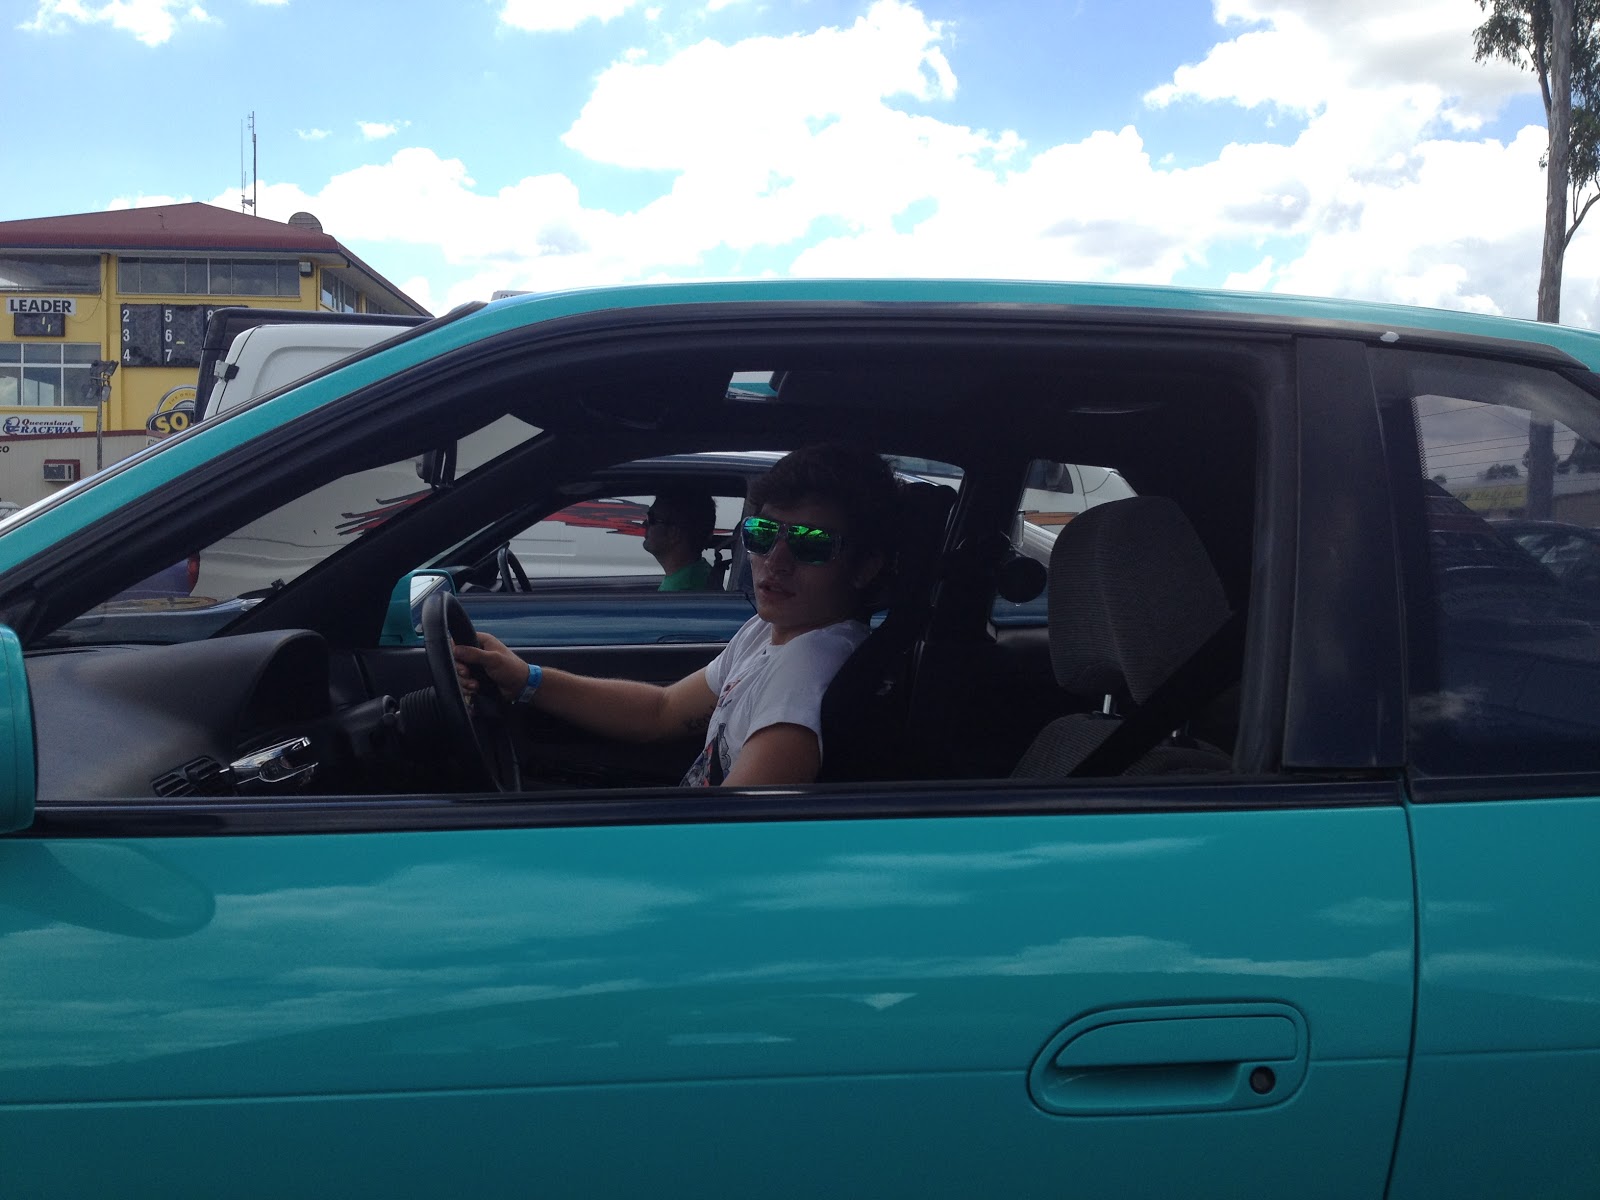

Casey pulling his stunned mullet look as we got ready to head out onto the track.


Queensland Raceway as it turns out is a very punishing track... Massively long straights, with some very tight corners, so you're accelerating very hard, then braking very hard followed by some very high speed corners.  The car is constantly under stress, whether its hard revving, hard cornering, or very hard braking.  I only managed to get 3 or 4 full speed laps in before I had to back off due to the unmistakeable smell of burnt brakes.  Did another 2 laps at half speed just to let them cool down, and then exited, only to find out pretty much everyone else had exactly the same issues =P  Its funny, most people think more power makes for quicker lap times, and by the end of it everyone was talking about how brakes need to be addressed for next time!

Stacey held up beautifully for the most part throughout the entire day.  Temperatures were never a cause for concern, tyres gripped the whole time, never had any real issues with oversteer or understeer, and the brakes (keeping in mind I was a bit gentler on them because I didn't want to aggravate the cracked rotors) did well all things considered.  The only issue I had was this...


A completely knackered tail fuse... turns out I haven't fixed the parkers issue! Whats really weird is that they were fine for the whole drive up in the dark, and for the drive from Lakeside to QR.  It was only after I left QR that they decided to do what they do best... burn themselves to death.  And I mean literally burn themselves.  Within 5 minutes of leaving QR, I had electrical smoke coming out of the steering column.  By the time I had a chance to pull over (no shoulders on the road I was on, and trucks like to rocket through the area) I had electrical smoke pouring out of the dash, coming up through the vents that you normally demist your windscreen through, out of the steering column, out from underneath the dash, and through the air vents too.  It also decided to take the fuel gauge, the stereo, the clock and the climate control with it.  Thankfully I was still able to drive her home, but it did put a bit of a dampener on the day.  However, not enough to ruin the genuinely great time I had.

I'll leave you with this... the only shot I have so far of me actually driving :)

Sunday, March 11, 2012

Lighting Issues and Junk...

So some of you probably saw on Facebook, but for those that didn't, I had a pretty epic lighting fail on Stacey.  The left headlight has been problematic for a while, but whilst driving to tennis, I also had all my parkers fail on me as well... No tail lights, no interior lights, and no front parkers whilst driving at night time with only one headlight.  Yeah, not dangerous at all!!!  So, figured it was probably time to do something about that...


I started off by pulling the whole front end apart and removing the intercooler as well, to make accessing all the wires easier.  I decided that starting on the parkers was more important, as I can kinda deal with one headlight, but can't deal with people not being able to see me at all.  I put the fuse back in, and everything started working again... weird!!  I hate having faults that randomly fix themselves, because then you can't really troubleshoot them, and you have no idea whats wrong.  Anyways, given that that was sorted, onto the headlights!


I had a spare indicator stalk that came with the car, and as part of the troubleshooting I decided to replace it.


Looking at the condition of these terminals, you would think this would be the cause of the issue right? Nope!!!!


I don't know if the picture shows it, but somehow 2 of the wires decided that they wanted to be friends... through quite a considerable amount of plastic.  They melted their way through and shorted out, which caused the issue.  


Re-terminated, re-soldered, re-connected, and everything seems to be happy.


Also decided to sort out the abomination that was the antenna hole cover.  Cut out the windscreen glue that was used and replaced it with this much neater and cleaner grommet :)


While I was putting everything back together, I noticed that my horn wasn't really fitting into the steering wheel... Perhaps this is why?  This is the worst of it, but the wheel was bent on all 3 spokes.  It happened while I was pulling the boss kit off the steering column, and anyone who's done one of these before knows just how stubborn they can be sometimes.  While I did get it off eventually, unfortunately this is the result...


Enter cheap SAAS wheel for $99 from super cheap auto... Given that I had a track day on the next day, I figured it might be useful to have a kind of useful steering wheel that I don't have to worry about!  It actually works quite well.  Given the seating position for me in this car, the deep corn steering wheel makes the driving position a tad odd and cramped, so having a flat wheel has made driving Stacey feel a bit more natural :)

Anyways, stay tuned for the track day post that will be coming very soon!

Sunday, February 26, 2012

Consolidating Colours pt. 2

So time to carry on where I left off... Given the amount of painting I had to do today, I decided to start off with the bonnet, to give my hand a break while I prepped the fenders.  The bonnet was already sanded from yesterday, so got the finger squeezing goodness off to a flying start... 


Four coats later, the bonnet is done!  Had to make sure I got all the edges as well, so that when the bonnet is on, you don't see any white when its closed.


I then started prep work on the guards.  It was good to finally get into them, as I'd spent a good 20 hours just waiting for fibreglass and bog to dry.  I thought the sander I bought yesterday was absolutely brilliant, but the rate at which it ate through bog?  Man its quicker than Kirsty Allen eating cake!!  Had to take the guards back quite a bit though, as there were several layers and qualities of paint on them which would've resulted in a very uneven paint job had I left them.  


I also had to add a second sheet of fibreglass to the indicator holes.  Due to gravity, the fibreglass dried with a bit of a curve to it, so when I was sanding back I was also sanding back fibreglass.  Unfortunately this meant that the strength of it was compromised, so a second sheet needed to be stuck on there to compensate.


After the guards were painted...


... it was time to fit everything back on.  Yes, I decided to keep one eyelid white. Hey, had to honour her heritage!!  The only purpose of test fitting the panels was to make sure that they all lined up before I bolted them in properly.  Theres a fair bit of play in each of them (i.e. bonnet had to move right by 3mm, front bar needed to shift over a good 8mm, the front left guard had to be pushed in in the middle, and the headlight covers/eyelids needed to be adjusted to make sure the curves still lined up) so it was good to make sure they were correct before I secured them.


Her all back together! Including lights, number plates, and finally a Nissan badge :)


Ive gotta say, she looks so much more meaner now she's all the same colour... The orange indicators also contrast with the black a lot better than they did with the white too.  


Also painted the mirrors while I was at it :)  Much quicker and easier than anything else I tackled this weekend.  You can see in this picture though that the new panels need some loving so that the sheen is consistent over the whole car.  I'm planning on waiting for the paint to properly cure before I give it a polish, and try to bring some of that gloss out.  After all, it is a gloss black that I painted it with... I would've liked to have seen more gloss and less satin.  Don't quite know why that came out this way actually =S


Anyways, stay tuned.  This has definitely sparked my inner mechanic to keep going!

Saturday, February 25, 2012

Consolidating Colours

After quite a lull in activity, I decided to finally pull my finger out of my ass and do something to Stacey... it's been way too long since I've spent some decent time on the car, and to be perfectly honest, I miss it!

One thing thats been on my to do list ever since I got the car was to consolidate the colours, so that the whole car is the one colour.  I did it to some degree back at the start of the year, but it was time to finish the job.

Before I get too far into it though, here's a reminder of what I'm starting with:


Although the car is now 2 colours (or you could argue 5 if you count the different shades of white), it's still too many...


I also wanted to get rid of these indicators... They were put in due to a confusion with legalities from the previous owner, but after figuring out they weren't needed, they were left in simply to fill the hole.  They don't house any bulbs in them, so there's no point in keeping them. Given what I was wanting to achieve this weekend, figured it would be a great opportunity to get rid of them.


Took this photo while I was in the process of pulling things apart... reckon she looks pretty good with the hood off :)


This is whats left after you pull off all the panels... the bonnet, the front fenders, the pods and the front bumper, all gone.  Makes you appreciate the purpose of this car - its business and not a lot else... Everything that's there serves a purpose, with not much care for aesthetics.


Kim you smart ass!!!!


Prepping the panels for painting... I didn't see any point in going right back to bare metal, given that this isn't a professional job by any means.  Just needed to rough up the paint enough so the new paint would stick.  Bought an orbital sander specifically for the job... WHY DIDN'T I GET ONE SOONER!!!! Seriously, it made sanding so easy!


The bonnet and the front bar prepped... I had to take the front bar back a fair bit further though, as there was quite a bit of wear and tear on it.  It may look like I haven't done anything to the bonnet in comparison, but the lack of shine is proof that I've taken a good coat or 2 off of it.


The crude spray painting booth in our garage =P  Front bar was quite tough to paint evenly though because there's simply that many curves, edges and angles on it.  Its not easy to get to some of the surfaces either, but I got there after quite a few cramped fingers.


Also time to see what that Nissan badge looks like on!!  This will be glued on at a later stage after I've sorted everything else out.  


Front bar test fitted... I personally think it looks great!  Need opinions though, Should I leave it at this finish or top it off with a clear coat to match the rest of the body?  I personally would love to do the rest of the car in such a finish, but it means that the whole car will be done as a rattle can job, and won't hold up anywhere near as long as a proper paint job.


Also started patching the holes from the indicators... Fibreglassing them was the first thing I did today, as the resin takes 12 hours to dry.

Stay tuned for an update tomorrow with part 2 of all these shenanigans :)  I really can't wait to see how it looks when its all back together!!

Saturday, February 11, 2012

Little Bits of Progress

Time for an update methinks, it's been too long since I've posted anything, but then again it's also been a while since I've done anything.  The last couple of weeks have seen me distracted by many distractions, and to be perfectly honest, Stacey hasn't been high on my priority list... Anyhow, there's been a few little bits and pieces that I've been slowly working on, so have a read!

The indicators have always been problematic since I got the car... The front bar was always missing them, which basically led to my indicators blinking fast (lower resistance due to less bulbs = indicator relay switching on/off faster because it can).  While it's not necessarily a problem, it does add to the 'there's something out of the ordinary, therefore Mr Pig should investigate' issue that plagues us import drivers.  Given the nature of the car and what the previous owner was trying to achieve, I couldn't not go genuine when it came to fixing this problem.

Enter these: Genuine Type X Front Indicators.


We'd tried experimenting with some various bodge-jobs to see if we could slow the indicators down, but all of the bulbs were rated too low.   Once I picked these up we worked out why... A standard indicator bulb is rated @ 12 Volts, 5 Watts.  The bulbs that are supposed to be used in this case are 12 Volts, 16 Watts - over 3 times as powerful as a standard bulb.  Not something thats overly easy to come by from your local auto store, but found something at a Global Auto Spares.


This is what they look like installed... the black garnish isn't easy to see at the best of times, but, thats the way they did it back then, so thats the way its going to be done here.


Told you they were significantly brighter than a standard indicator bulb ;)

I also had issues with the left headlight... found out on a dark and rainy night that the bulb had stopped working, the lack of visibility kind of gave away =P It wasn't blown, it just simply wasn't getting power.  About 4 hours of troubleshooting led to a blown fuse (turns out this car has one fuse for each headlight) and it blew another fuse the second I turned on the lights.  Could not for the life of me figure out why, the end solution was just to run a higher rated fuse.  Far from ideal, far from safe, but there was nothing out of the ordinary with the electrical system from what I could gather... stumped!

Now when I got the car, it came with an air/fuel ratio gauge.  It was never plugged in, just bolted to the side of the center console.  For the uneducated, it basically measures the percentage of oxygen thats coming out of your exhaust, and lets you know whether you're running rich (too much fuel -> bad economy) or lean (not enough fuel -> can blow up your engine).  Decided today that it needed to be plugged in, because I was bored and its not a terribly involved job.


It never ceases to amaze me how quick and easy this interior is to pull apart... All I was doing here was running/tracing wires, and soldering the wires into their respective sources.


Given that the boost gauge was already mounted on the steering column, I decided to mount the new gauge on there as well just for ease of reading.  A quick drill, a quick screw, and thats the two brackets mounted.  For the record, I am aware that my instrument cluster is in terrible condition!!


Here they are installed... sorry for the terrible quality picture, camera kept focusing on the steering wheel and I couldn't get it to focus on the gauges themselves.  I moved the boost gauge to the top just to make it easier to read, as it's a little bit more vital than my A/F ratio.  For those of you who are concerned that I put it right in front of my speedo, don't worry, you can still see the needle fine! Pretty sure boost is a little bit more critical than speed anyways...


The interior as it sits now... Gauges sorted out, center console finally finished properly, black gear boot instead of a dirty white one...


Everyone loves a bit of sticker love :) 

The next things on the to do list:
- Replace Oxygen sensor (found out from todays exercise that my existing o2 sensor is a little bit on the wrecked side)
- Paint front end, so the whole car is one colour
- Get some wheels that sit properly instead of running stupid spacers (looking at April at this stage based on when they're arriving in the country)

Watch this space!