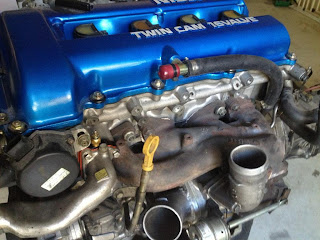
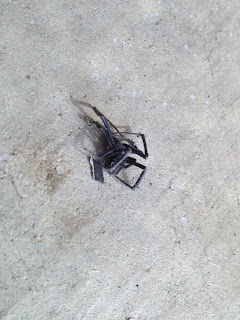
Alright!! Carrying on from last week you may remember we were trying to get the engine bay to a point where we could start her. Unfortunately due to time, motivation and light we to leave it in a non-startable way. Thankfully Monday yielded me a couple of extra hours after work so I was able to keep progression flowing.
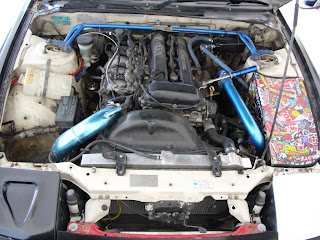
I must say the engine bay was coming along very nicely! This photo exists only because I realise the one I posted last week was actually incredibly terrible quality.
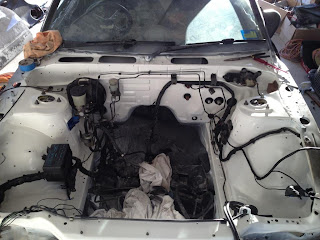
Continuing on from last week, here's a before and after of the battery tray modifications finished with all auxiliaries installed. Very very VERY happy with how it has come up I must admit! Almost looks like it's meant to be there :) I proceeded to go around all of the hose clamps and make sure everything was tight. Due to the fact that we left the car in a bit of a limbo state on Sunday, there were a couple of loose clamps I certainly knew of, but it never hurts to double check.
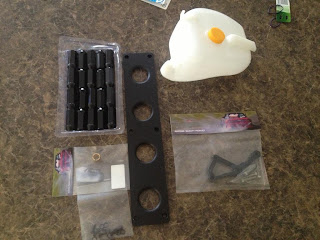
To comply with current QLD laws, the pod filter was secured with a small little bracket bought from Super Cheap Auto, cut to size with some tin snips and massaged into shape with a mallet... I like knowing how to adapt :) works well for me!
Fluids were the next thing to go in. Brake, clutch and power steering fluids were added just so the engine wasn't starting with nothing in them, and gearbox oil came in at a lucky last. I never enjoy filling this sucker up... As you can see in the photo the fill port is on the side of the gearbox. Given you've kind of got a lot of metal next to it, it can be very tricky to actually get oil in there. Thankfully a little hand pump made the job a hell of a lot easier :)
By this point I was ready to start the engine. It's always a good idea to manually crank the engine if it's been standing too long - just helps circulate the oil a bit and provide that bit of extra protection when they crank over. Due to the compression in the engine it's not as easy as you may think, yet while this isn't a 'necessary' step it certainly does help for peace of mind.
This is what greeted me. Took a couple of goes to actually run thanks to fuel being so far down the line and blowing out some cobwebs, but once she was running she wasn't a happy camper! She had a misfire, and would also 'hunt' on idle... basically the air/fuel mixture is wrong, and as a result it revs high then low then high etc. It's worth noting that it sounds so ridiculous because the exhaust isn't on yet =P While it was great news that it started, it meant I had a bit of work ahead of me figuring out what was causing the odd behaviour.
The first point of call was the vacuum lines. They are the most common cause of engine shenanigans - as the engine spins it creates a natural vacuum effect that is used to power everything from emission control to brakes. Because we'd made a few modifications along the way, I found that there were 2 nipples on the intake that are used as vacuum sources that were no longer being used thanks to some items we deleted. I made sure to block them off, but unfortunately it did not help with any of the engine dramas.
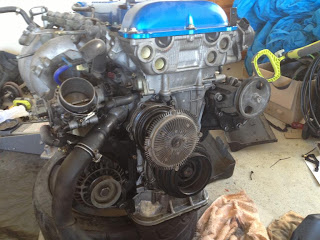
I also noticed the high-pitched sound of pressurised air leaking from the engine after it was turned off. It's safe to say that it probably made that noise the whole time, I just couldn't hear it over the other noises that are generated by a running engine. Given that the only real thing I had changed on the engine was the rocker cover gasket, I decided to check that first. Although I didn't find anything obvious, I was informed that it's always a good idea to put some gasket goo around the critical areas of the rubber seal. Back together and goodbye noise :) Unfortunately it still didn't fix the issue.
It then occurred to me that the fuel in the tank had probably been sitting there for at least 8 months - probably a lot longer than that but I knew for a fact it was at least that old. As a precaution I proceeded to pump 15 litres of old fuel out, to be closely followed by 15 litres of new fuel. Unfortunately Nissan in their infinite wisdom decided to not include a drain plug in their fuel tank. The solution? Bridge the relay for the fuel pump, disconnect a fuel line and pump all the fuel out manually!
The bright side was at least it worked :) It was off to a bit of a shaky start, but once she was getting solid clean fuel into her, she was happy as Larry! Monday wasn't so bad after all.
Engine done :) I really am chuffed with how well it has come up hey... and in a way I really am disappointed that I won't go to the same amount of effort on the rest of the car - just seeing this difference alone really is a great vote of confidence for what I've been able to achieve.
With the engine completed I moved on to the body work during the rest of the week. Given how stripped she was I had a fair bit to do - but I decided to start with attaching the new fenders. Before I got too far into it though...
... it would only make sense to start with something that's going to take some time - the sunroof. Bogging was the first step to fill in the imperfections. While that was drying I moved back to the fenders.
The hardest part of the fenders was making sure everything lined up. It is hard though when no holes are pre-drilled... I had to guess and check umpteenth times before just taking a punt, drilling a hole and seeing if it worked. Needless to say there was some trial and error involved... especially when you've got 6 different panels that the stupid things have to line up to. Door, bonnet, front bar, lights, pods and body work.
It wasn't until I had both sides fully together, bolted and cable tied where needed until I realised that I had forgotten to install the front reinforcement bar - Nag dabbit!!! Had to pull it all apart to get it in, and re-bolt and cable tie everything back together, something that took the better part of another hour (sigh).
The guards also required a bit of love and massaging to get everything to work. The front indicators were a great example, necessitating the use of several different sized files to get the hole to the right shape so the damn indicator would fit. Thankfully fibreglass is pretty easy to work with, so it didn't take too long!
And here we have the front end kind of back together, with everything installed and lined up :) Small steps I tell you, small steps!
I continued working my way around the body as afternoon turned into evening. It's been a while since I've worked on a car at night with a portable fluoro light for a friend, and strangely enough I found myself missing it! Thing was, I had motivation and drive, and I thought it would be a shame to let it go to waste. I proceeded to install other panels including the side skirts and other pods until it was dinner time... having to clean yourself up to eat is a pretty good excuse to leave it there. No point getting dirty again!
Pretty damn chuffed with the progress I was making :)
Rear fenders were the next thing to cross off the list. 3 drill bits and 40 odd rivets meant the rear guards were attached. A little bit more stable than just masking tape that's for sure! The right side required a bit of man-handling as it didn't sit quite right, but all in all I'm really stoked I decided to go for over-fenders vs. bolt ons. It really does tie the look of the car together much cleaner... Even un-painted they look the goods :)
Back to the sunroof, some sanding was done to be closely followed by some primer-filler to fill in the imperfections. Some more sanding and some paint equals:
Something that resembles a bit more of a roof.
Now while I don't have photos for the next part, let me tell you that's simply because I was too busy and a tad stressed to consider them. Kim (my flatmate) needed the garage ASAP to fix his car. In order for that to happen, I had to get my car to a point where I could completely seal it, and that it would move under its own power. For this to happen, the windows had to go in, the sunroof re-installed, a seat was required in order to drive, the exhaust had to go back on, and the brake and clutch lines filled and bled.
Everything for the most part went to plan, until we got to the clutch lines. For the record, I've never had to bleed a clutch before (for those that are wondering, I'm talking about removing all the air from the lines - not slashing it until it drips fluid in a sinister manner). The idea is pretty simple really, pump the clutch pedal until pressure builds up, hold the pedal in, undo the bleed nipple so the built up air can escape, and rinse and repeat until you get no more air - only straight fluid.
We did this for a good hour on the clutch slave cylinder (where we thought it would need to be bled from). From what we could tell we had all the air out of the lines, but there was one massive problem - the clutch pedal would only return halfway. With a bit of coaxing from a human, it would return to its original position, but it couldn't do it of its own accord. It also didn't fully engage the clutch when the pedal was pressed, meaning I couldn't select a gear. This had me rather worried!
I decided to keep going with other work while I tried to come up with a solution. It's a great theory - distract your mind and you end up coming up with what you're chasing... Thanks for the idea Sheldon! (Big Bang Theory reference for those that aren't following =P). Given how close I was to finishing the exterior, I decided to knock that fully on the head before moving onwards. It was certainly bizarre seeing her back together after so long apart!
My priority with the interior was to first make sure I could close her up - if she had to spend a night outside while Kim sorted out the issues with his car, I wanted to know she was going to be lockable and weatherproof. Windows were the first thing to go in, but while I was at it I decided to finish the doors off, as they weren't going to require too much more work and I could say they were done.. Unfortunately this mindset didn't really stop.
Before I knew it I had half the interior back together =\ Screws were absolutely everywhere, so there was certainly a lot of trial and error trying to figure out what went where. Lucky for me there's only so many combinations you can try before you figure it out. There were a hell of a lot of spares, but I had one for every hole so I could only assume they were left over from parts I was no longer using or screws I replaced with new ones. Enough farting around though, back to the clutch problem.
After some reading was done, some things were contemplated, some work was performed and some beers were had, I decided to also bleed the clutch master cylinder. Now while it also has a bleed nipple on it, my lack of experience and gut feeling assumed that you bled fluids at the end of a line, not at the start. Given I was out of ideas I decided to give it a shot. Lo and behold, after 20 minutes bleeding the master cylinder, the clutch pedal acted as one would expect!!! So incredibly thankful it wasn't anything more serious, I was very close to buying new clutch master/slave cylinders =\
With how close I was to finishing the interior I decided to smash it out and knock it completely off. You may notice that there is no carpet installed - that's simply due to the fact that the old stuff was sodden and stank, and as a stripped out track car, the carpet would be the first thing to go so I've decided to leave that at the buyers disgression.
The exterior? Done completely. The interior? Also done completely. Driveability? Time to find out. Not only did she move, she also got out of the driveway with only a minor scrape thanks to the suspension lift I did a while ago! I took her for a quick shakedown around the block, and man it felt good to be back in a proper car!! As expected for a car that's been fully pulled apart and put back together over a couple of months, there are a number of teething issues that need to be sorted out, but for all intents and purposes I think she's at the stage now where it's time to look at saying goodbye.
It really is a damn shame that the exterior is so all over the shop - every inch of me wants to sort her out and get her as one colour with the same finish all over... it's something I've never ever seen in the two and a half years I've owned her for. I'm sure a lot of you know what it's like to have an image in your head - I do genuinely believe she would look properly great if I took the time, money and effort to see her through to the end. I still maintain though, for the time, money and effort it's going to take for that to happen, I honestly don't believe I'm going to see that back afterwards on a sale price, nor will the satisfaction in finishing her compensate for that.
On that note I guess this is it for Project Correct-a-Car. She is back together, she drives and she has registration. While it's not the ending I had originally envisaged, it certainly is an ending none-the-less. I almost feel at a loss leaving things here... it doesn't feel quite right. I suppose that's one of the benefits of having an engineer's mind - it gets easier and easier to recognise smart decisions and make them objectively. That said, the subjective side of me really does struggle when I open her bonnet and see that shiny new engine bay...
So where to from here? First up, a look back at everything that's happened - the highs, the lows, and everything in between. I've taken the time to go through all the photos I've taken, and I honestly do believe it's worth it to summarise this epic journey. From there, it will be another project. Another love/hate relationship with another money pit that exists for the sake of keeping me busy, inflicting pain wherever possible, educating me and putting a smile on my face.
Because at the end of the day, that's what it's about. And at the end of the day, it is oh-so-worth-it :)


