Anyways, in the attempt of keeping potential costs as low as possible, the aim is to strip as much as I can so that she can get pretty much dropped in and they can get straight to work. Over the last couple of months, this has been happening in small steps, but I haven't committed too much because the priority has always been to find someone who can do the work. Now that that has been (potentially) confirmed, the biggest thing is getting the engine and gearbox out. Pre-emptive thanks to Casey for offering his time and engine crane to get it out (tomorrow's job), but in order to do that, a few things had to be done first.
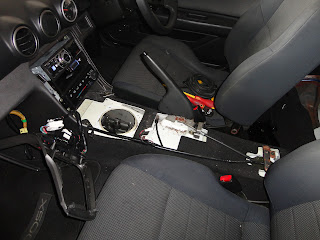
First step was to remove the gear shifter... Easy enough, although had to laugh that the engineers put 2 of the bolts that secure the shifter to the gearbox in a place that isn't accessible through the hole... I mean, really? Nothing a flexible spanner can't fix though. For those that don't know, the general idea is that the engine gets pulled out with the gearbox still attached, hence the necessity to remove the shifter.
Even after 2 and a half years of owning this car... still get a kick out of seeing this...
Having the car on 3 candlesticks still see's the final wheel quite clearly off the ground... gotta love how stiff the chassis is!!!
Given that its been so long since I've been under the car, forgot about this... Yes officer, my car is soooo a legal height ;)
For those of you that know, Edna had a habit of flaming quite a bit. Now another part of getting the engine ready for being pulled out is to remove the exhaust. Easy enough, but given how much she flamed, thought it would be very interesting to see what the inside of the exhaust was looking like... Yep, it's burnt alright!!
Tail shaft comes out next. Provides power from the gearbox to the rear axle, and given that the gearbox is being removed, it couldn't stay in. I wanted to detach it in the middle, because that would've been a hell of a lot easier. Unfortunately, try as I might, and because of the proximity of the bolts to the tailshaft, I couldn't get the ring end of a spanner on any of the bolts, only the crescent end. This meant I couldn't undo the bolts without risking stripping them (given how tight they were on), so had to take it off from the rear instead. Even then, it took 2 spanners linked together for the extra torque, using both arms and a foot on one of the rear wheels for extra force. Sure it's nice to know that it wouldn't fall off in a million years, but seriously?
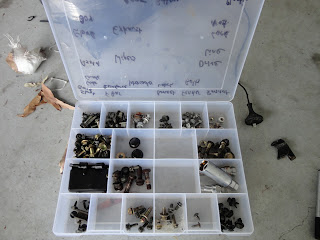
The growing pile of parts that have already been pulled off that I can still use...
And allllllllllll the screws associated with it...
Just had to share this... While cleaning up, found a screw driver on the other side of the garage that I'd been using. Instead of simply walking over and putting it in, I decided to test my skills by throwing it from where I was and seeing if I could get it in... As you can tell by the picture, I did miss, but could not stop laughing at what happened instead =D
The final step was to disconnect as much as I could from the engine, so it would come out without pulling anything with it. You can see all the plugs, looms, wires and pipes sitting up the top out of the way, now to try and remember where they all go in a couple of months time!
And so concludes the days work! Stay tuned for part 2 tomorrow when Casey, Kim and I pull out the engine and gearbox ;)


No comments:
Post a Comment