Sunday, December 11, 2011

Momentous Preparations pt. 2

Continuing on from yesterdays post, today was the day of removing the engine and gearbox.  Massive thanks to both Kim and Casey for their help today.  First thing was to make the final few preparations in order to make this possible.  Couldn't do them yesterday just because it meant things would be loose, so a quick socket session was required.


Gearbox mount was the first thing to be removed.... all it does it make sure the gearbox doesn't move in relation to the chassis.... Could have been problematic given that we wanted to move the gearbox in relation to the chassis =P so it was abruptly removed.


Also had to remove the engine mounts.  The bolts are in an incredibly hard to reach spot, which wasn't made easier by the jack stand that was supporting the front end of the car, or the jack that was supporting the gearbox.  Simply getting the socket over the bolt was tricky enough, let alone trying to remove it!  All 3 of us had a go, 20 minutes later we finally got the problem child out.


Casey getting the strap and crane ready to lift the engine out... 


Final checks before the lifting begins... basically the strap is pre-tensioned to make sure that both the strap and the knots are capable of lifting the engine and gearbox out, and seeing if there's anything I'd forgotten from yesterdays escapades.  Turns out I had... clutch slave cylinder (effectively connects your clutch pedal to your clutch) and the heater hoses.  It does need to be said though, the heater hoses were intentional - the extra room provided by moving the engine forward gave us that little bit extra room to make the removal of the hoses comfortable. 


The idea is that as you lift the engine, you first need to make sure the mounts come out clean before you can go any further.  They should come out in 1 piece... For those that don't know, they're NOT meant to look like this!!!  For whatever reason, this mount hasn't been doing its job for an unknown period of time... Lazy ass engine mounts.  Time for some new ones I think!


All of us making sure that the engine wasn't going to foul on anything as we pulled it out.


Engine and gearbox being pulled out as one whole unit.  From what I understand, having no front end on the car made it unbelievably easy to pull out.  Pity that when it goes back in, this won't be the case...  We did have some clearance issues with the power steering rack, but other than that it was pretty smooth sailing.


Kim appreciating a Nissan engine in its entirety.


The resulting cavity from pulling it all out.  Amazing how roomy it is, although I suspect that may have something to do with the fact that structurally there's not a lot else left....


The engine in its new home... While it's out, I'll be taking the opportunity to refurbish it a bit.  Replace seals, clean it up, address some outstanding issues etc.


What can I say... feels good to drive her again ;)


And its about this time that the storm rolled in... Cue an afternoon of chilling in the garage on spare tyres, drinking beer, listening to music and some all round good times :)  Not a bad way to spend a Sundy arv!!!

Once again, thanks to Casey for the loan of his engine crane, Kim for the loaning of his van to pick up said engine crane, and the both of them for their help, extra set of eyes and general awesomeness!  Now that this is done, the next step is to tackle the final tidy up before she gets taken into the smash repairers.  Stay tuned.

Saturday, December 10, 2011

Momentous Preparations pt. 1

This week saw the successful booking in of Edna into a workshop between Christmas and New Years to get her new front end put on!  Thanks to some suggestions from friends, looks like Adrenalin Motorsports will be doing the dirty deed :)  It will be pending on a quote at this stage, because I'm still not sure how much its going to cost to do such a job.  Have to be prepared that the cost of repairing her will be too much, but it is indeed a start.

Anyways, in the attempt of keeping potential costs as low as possible, the aim is to strip as much as I can so that she can get pretty much dropped in and they can get straight to work.  Over the last couple of months, this has been happening in small steps, but I haven't committed too much because the priority has always been to find someone who can do the work.  Now that that has been (potentially) confirmed, the biggest thing is getting the engine and gearbox out.  Pre-emptive thanks to Casey for offering his time and engine crane to get it out (tomorrow's job), but in order to do that, a few things had to be done first.


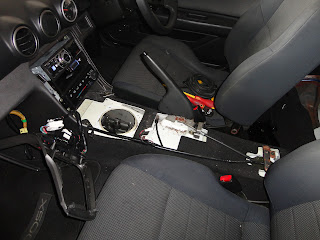
First step was to remove the gear shifter...  Easy enough, although had to laugh that the engineers put 2 of the bolts that secure the shifter to the gearbox in a place that isn't accessible through the hole... I mean, really?  Nothing a flexible spanner can't fix though.  For those that don't know, the general idea is that the engine gets pulled out with the gearbox still attached, hence the necessity to remove the shifter.


Even after 2 and a half years of owning this car... still get a kick out of seeing this...


Having the car on 3 candlesticks still see's the final wheel quite clearly off the ground... gotta love how stiff the chassis is!!!


Given that its been so long since I've been under the car, forgot about this... Yes officer, my car is soooo a legal height ;)


For those of you that know, Edna had a habit of flaming quite a bit.  Now another part of getting the engine ready for being pulled out is to remove the exhaust.  Easy enough, but given how much she flamed, thought it would be very interesting to see what the inside of the exhaust was looking like... Yep, it's burnt alright!!


Tail shaft comes out next.  Provides power from the gearbox to the rear axle, and given that the gearbox is being removed, it couldn't stay in.  I wanted to detach it in the middle, because that would've been a hell of a lot easier. Unfortunately, try as I might, and because of the proximity of the bolts to the tailshaft, I couldn't get the ring end of a spanner on any of the bolts, only the crescent end.  This meant I couldn't undo the bolts without risking stripping them (given how tight they were on), so had to take it off from the rear instead.  Even then, it took 2 spanners linked together for the extra torque, using both arms and a foot on one of the rear wheels for extra force.  Sure it's nice to know that it wouldn't fall off in a million years, but seriously?


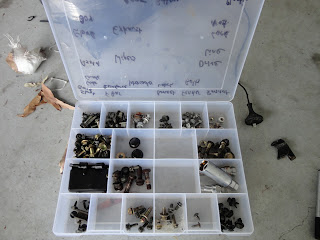
The growing pile of parts that have already been pulled off that I can still use...


And allllllllllll the screws associated with it...


Just had to share this... While cleaning up, found a screw driver on the other side of the garage that I'd been using.  Instead of simply walking over and putting it in, I decided to test my skills by throwing it from where I was and seeing if I could get it in... As you can tell by the picture, I did miss, but could not stop laughing at what happened instead =D


The final step was to disconnect as much as I could from the engine, so it would come out without pulling anything with it.  You can see all the plugs, looms, wires and pipes sitting up the top out of the way, now to try and remember where they all go in a couple of months time!

And so concludes the days work!  Stay tuned for part 2 tomorrow when Casey, Kim and I pull out the engine and gearbox ;)